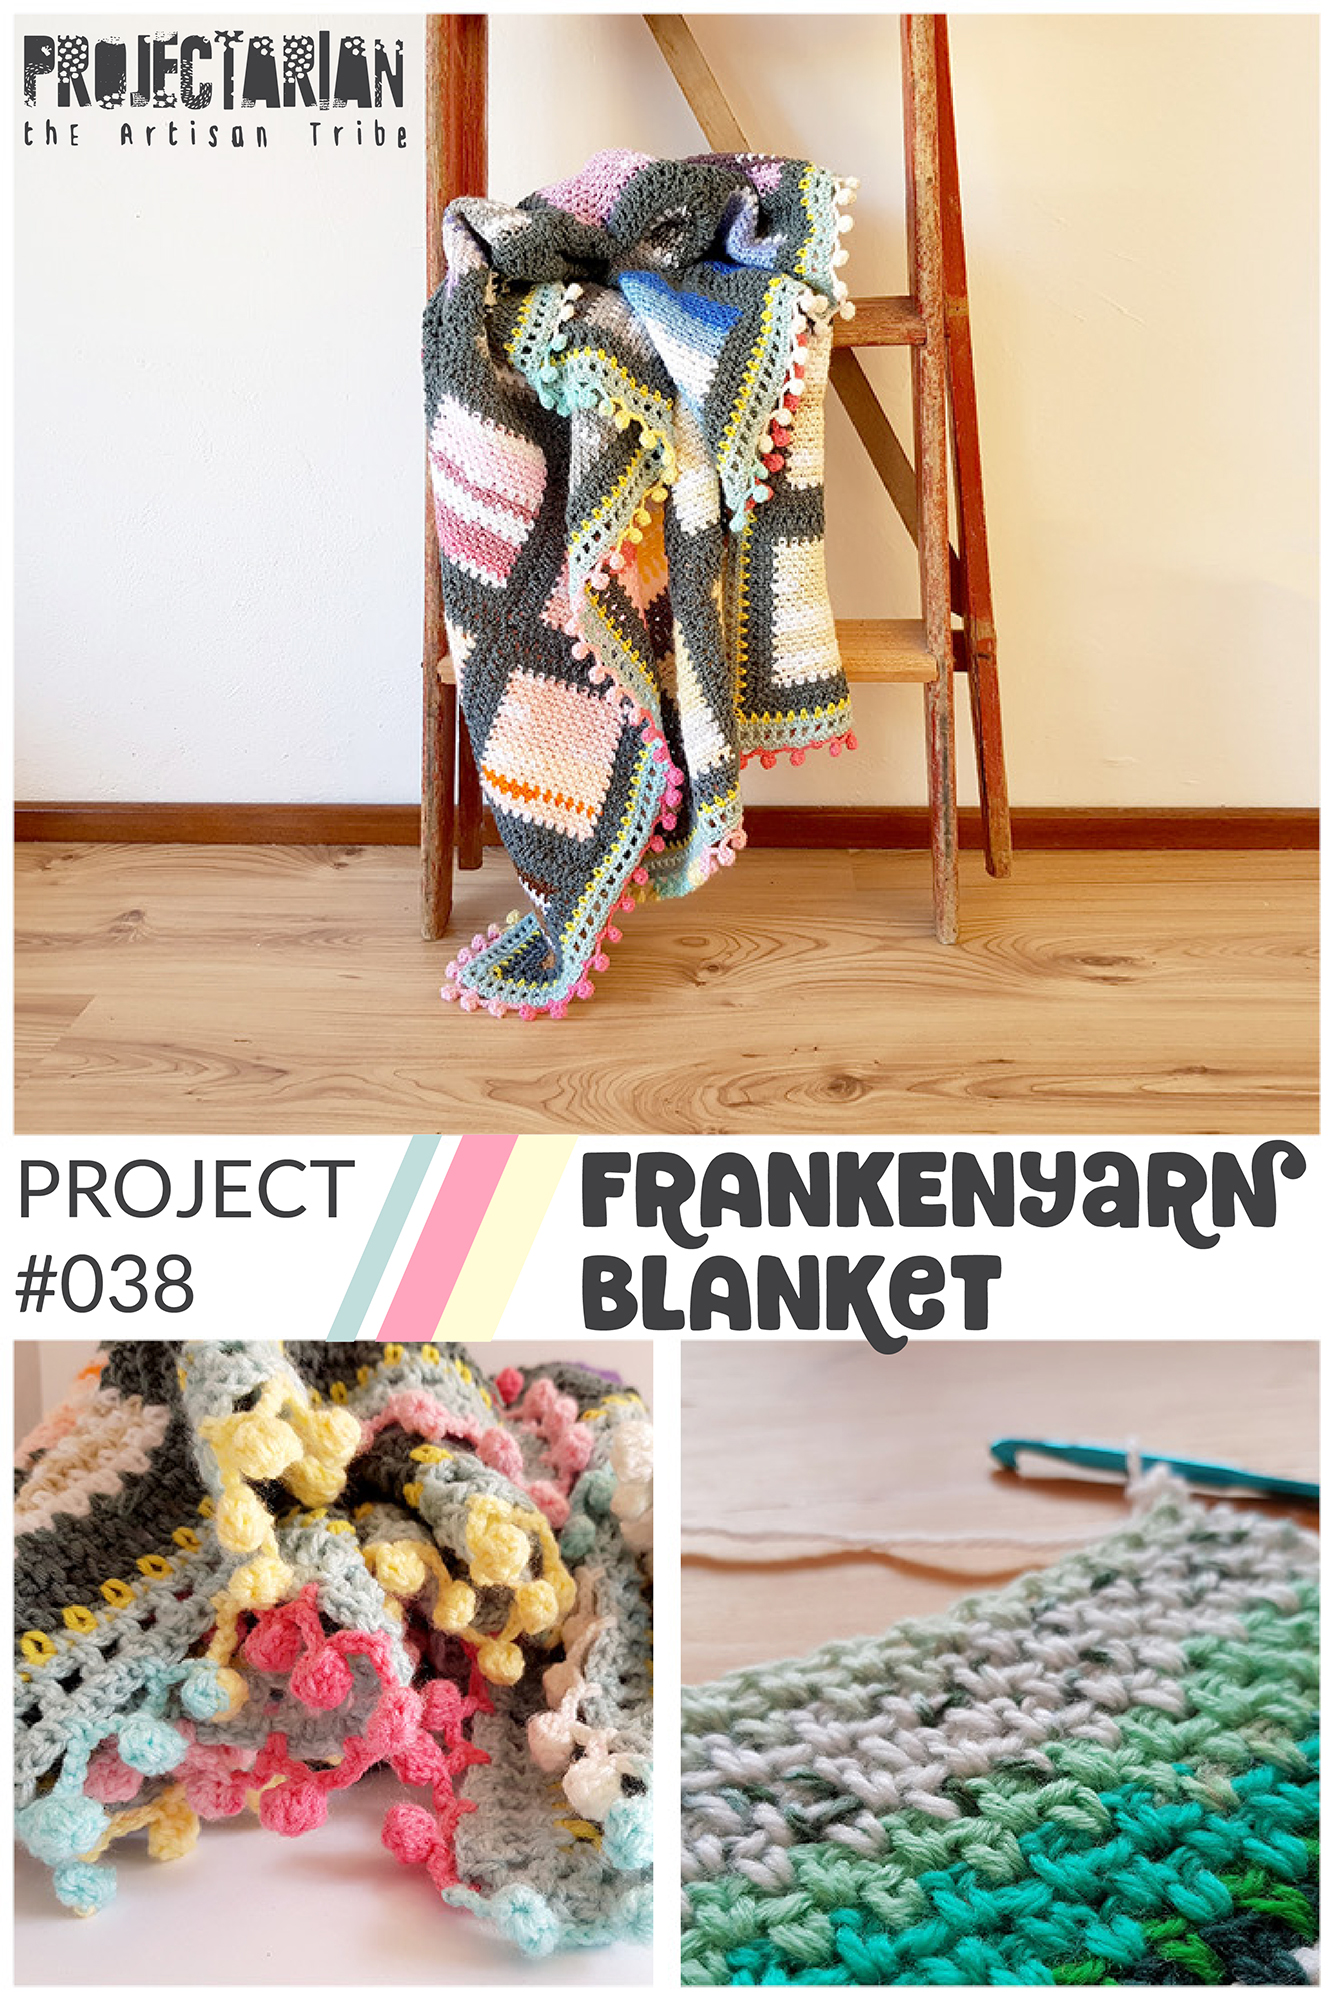
It’s the fourth and final part of my free Frankenyarn Blanket project! In this part, I’ll show you how to join the squares and do the fun pompom border around the edge!

See Part 3 for all the extra pattern info you’ll need, like yarn quantities and crochet stitch abbreviations. Click here for Part 1 and Part 2.
JOINING
In this tutorial, I’ve used 4 squares as an example to show you how to join them. The diagram below by Cypress Textiles shows which direction to work, no matter how many squares you’re joining:
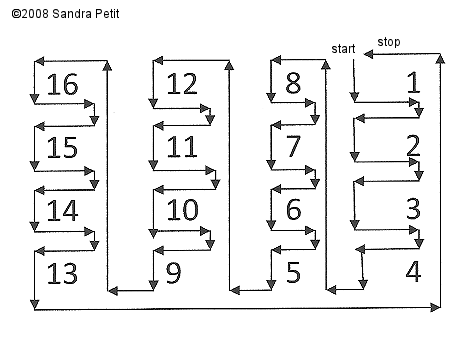
To begin, decide how you want your squares arranged on your finished blanket and lay them out, then stack them with number 1 on the top, and each following square underneath.

Since I made my yarn ball with the colours in rainbow order, I’m joining them in the same order.

Start in the top right hand corner of Square 1.

Crochet along three edges of Square 1
Insert your hook in the ch1 space. Join yarn with a SS. SC in same space. Ch5, SC in SC in same space. *Ch3, SC in next ch space.* Repeat all across the edge.
When you reach the corner, SC in ch space, ch5, SC in same space.
You will have 13 loops of 3ch across the edge, excluding the 5ch in each corner.

*Ch3, SC in next ch space.* Repeat all across the edge. When you reach the corner, SC in ch space, ch5, SC in same space.
*Ch3, SC in next ch space.* Repeat all across the edge. When you reach the corner, SC in ch space, ch5.

Attach Square 2
SC into the top right hand corner of Square 2.

*Ch1, SS into next 3ch space on Square 1. Ch1, SC in next ch space on Square 2.* Repeat all across the edge.

When you reach the corner, SC in ch space, ch5, SC in same space, leaving the corners un-joined.

*Ch3, SC in next ch space.* Repeat all across the edge.
When you reach the corner, SC in ch space, ch5.
Attach Square 3
SC into the bottom right hand corner of Square 3.

*Ch1, SS into next 3ch space on Square 2. Ch1, SC in next ch space on Square 2.* Repeat all across the edge.
JOIN 2 CORNERS
When you reach the corner, ch2, SS into the 5ch space on Square 1, ch2.

Attach Square 4
SC into the bottom right hand corner of Square 4.

*Ch1, SS into next 3ch space on Square 1. Ch1, SC in next ch space on Square 4.* Repeat all across the edge.
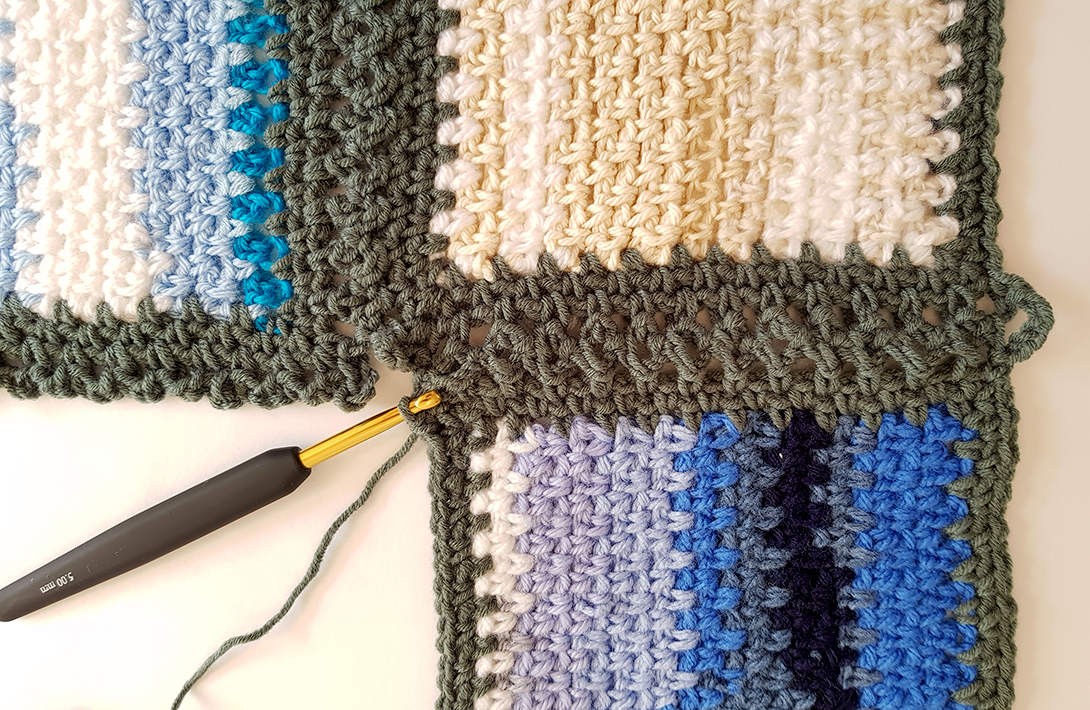
JOIN THE EDGE CORNERS
When you reach the corner, ch2, SS into ch5 space on Square 1, ch2, SC in same ch space on Square 4.
*Ch3, SC in next ch space.* Repeat all across the edge.
When you reach the corner, SC in ch space, ch5.
*Ch3, SC in next ch space.* Repeat all across the edge.
When you reach the corner, SC in ch space, ch5.
*Ch3, SC in next ch space.* Repeat all across the edge.
Now you have reached the point where all 4 corners need to be joined up.

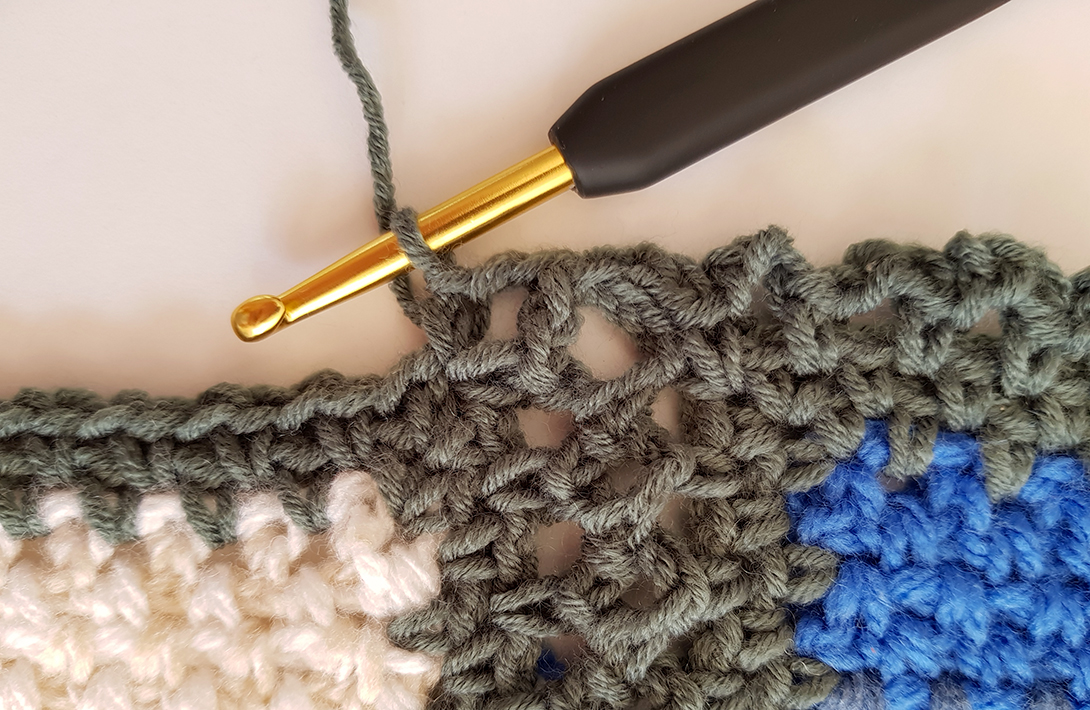
JOIN ALL 4 CORNERS
Insert your hook into the SS that joins Square 3 to Square 1.


Then insert your hook into the 5ch space on Square 2 as well.
Make a SS.
All 4 corners are now joined together.

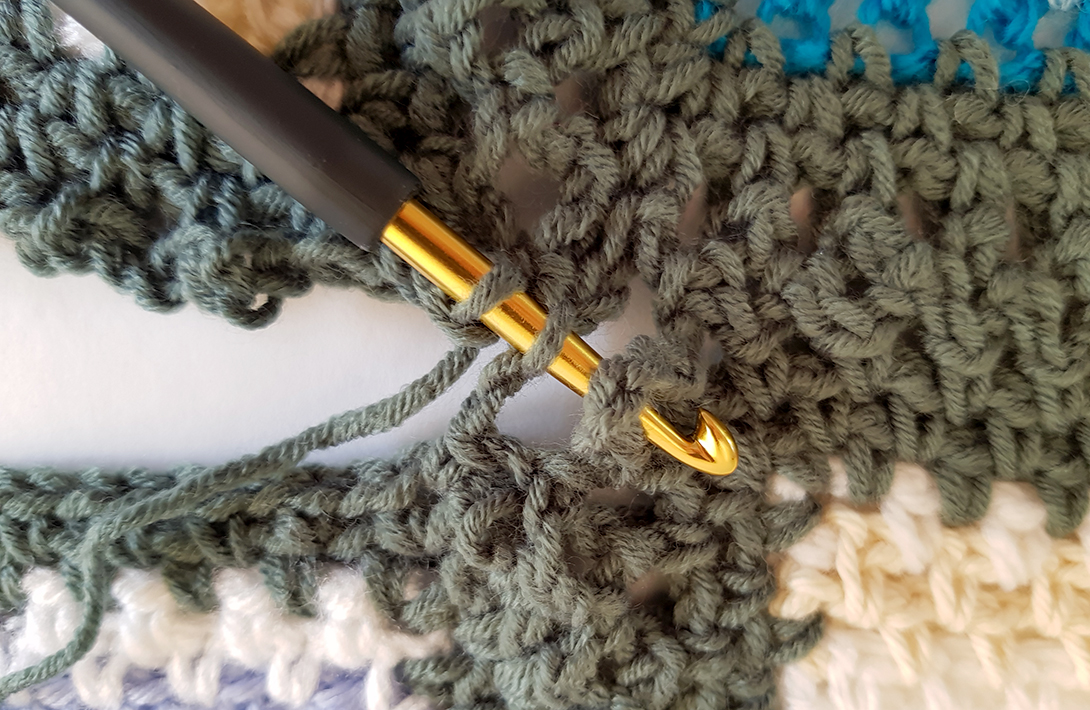
Chain 2.

SC in corner1ch space of Square 3.
*Ch1, SS into next 3ch space on Square 4. Ch1, SC in next ch space on Square 3.* Repeat all across the edge.

*Ch1, SS into next 3ch space on Square 1. Ch1, SC in next ch space on Square 4.* Repeat all across the edge.
When you reach the corner, ch2, SS into ch5 space on Square 4, ch2, SC in same ch space on Square 3.
*Ch3, SC in next ch space.* Repeat all across the edge.
When you reach the corner, SC in ch space, ch5.
*Ch3, SC in next ch space.* Repeat all across the edge.
When you reach the corner, ch2, SS into ch5 space between Square 3 & 3. Ch2, SC into corner 1ch space on Square 2.
*Ch3, SC in next ch space.* Repeat all across the edge.
When you reach the corner, SC in ch space, ch5.
*Ch3, SC in next ch space.* Repeat all across the edge.
When you reach the corner, ch2, SS into ch5 space between Square 3 & 3. Ch2, SC into corner 1ch space on Square 2.
*Ch3, SC in next ch space.* Repeat all across the edge.
Finish with a SS into the 1st SC on Square 1.
BORDER

R1: Continue working with the joining colour yarn.
SS into corner 5ch space. Ch1, SC in same space. Ch2, SC in same space. *Ch1, SC in next ch space.* Repeat all across the edge. When you reach the corner, SC, ch2, SC into corner 5ch space. Repeat this method all around the whole blanket, and finish with a SS into the 1st SC.
Tie off and cut yarn.
R2: Join a new colour with a SS at any 1ch space. Ch1, SC in same space, *ch1, SC in next ch space. * Repeat all across the edge. When you reach the corner, SC, ch2, SC into the same ch space. Repeat this method all around the whole blanket, and finish with a SS into the 1st SC.
Tie off and cut yarn.
R3: Join a new colour with a SS at any 1ch space. Ch1, SC in same space, *ch1, SC in next ch space. * Repeat all across the edge. When you reach the corner, SC, ch2, SC into the same ch space. Repeat this method all around the whole blanket, and finish with a SS into the 1st SC.
R4: SS into next ch space. Ch3 (counts as DC, ch1). *DC in next ch space, ch1.* Repeat all across the edge. When you reach the corner, DC, ch2, DC into the same ch space. Repeat this method all around the whole blanket, and finish with a SS into the 2nd ch of the starting ch.
R5: SS into ch space. Ch1, SC in same space, *ch1, SC in next ch space. * Repeat all across the edge. When you reach the corner, SC, ch2, SC into the same ch space. Repeat this method all around the whole blanket, and finish with a SS into the 1st SC.
Tie off and cut yarn.
Now it’s time to do your pompom edge. CLICK HERE to learn how to make do the pompom stitch with the tutorial by Once Upon a Pink Moon.
R6: Join pompom colour with a SS at any 1ch space. Ch1, SC in same ch space. Pompom, skip next ch space, SC in next ch space (each pompom will have a chain 3 on either side). Repeat this method all around the whole blanket, and finish with a SS into the 1st SC.
Your Frankenyarn Blanket is complete!

For interest’s sake, here is a similar pattern I came across recently, which gives you an idea of how your blanket could look if you use your colours randomly, rotate every other squares and then join them with a beige colour. This is Colorful Mat by Pierrot:

SHARE IT
I would love to see your colourful Frankenyarn blankets! You can share you photos with me and all your fellow artisan tribe members in our Facebook group. You can also hashtag your pictures with #ProjectFrankenyarn, and tag me @Projectarian on Facebook or Instagram to show me your beautiful project!
PIN IT!
Thank you I love your work it is so different .
You’re welcome Carol, I’m so glad you enjoy it!