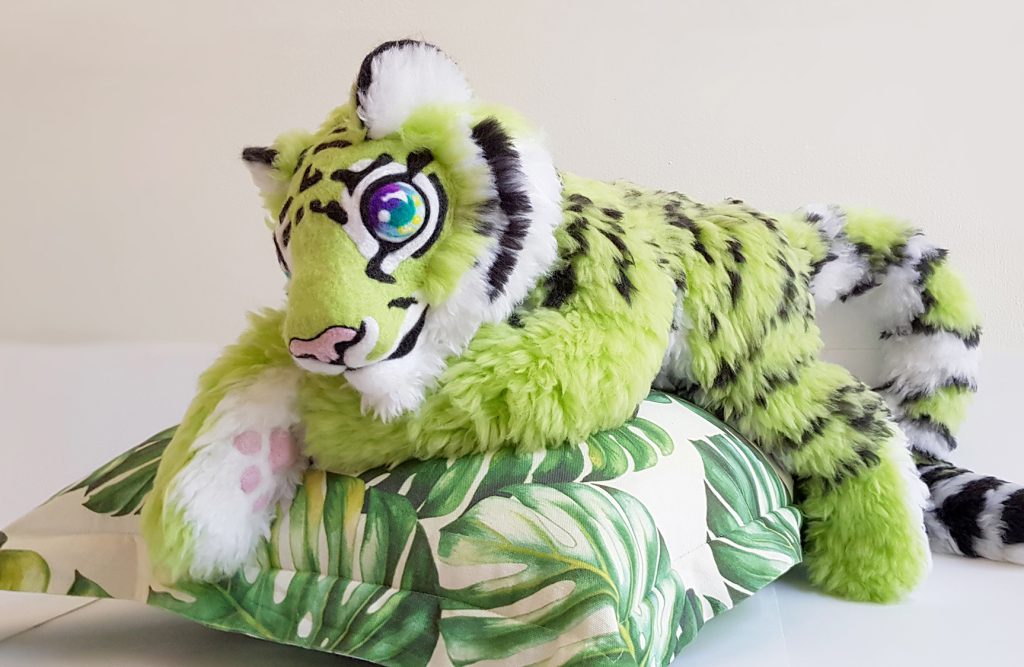
For Dollightful’s Tropical Doll collaboration, I decided to customize Atlas The Lion Cub and turn him into a fully furred and felted tiger! Yes, okay, that was in 2019, but instead of editing the video I ended up rescuing a puppy who consumed my life for several weeks, then I had to catch up on my usual pattern-writing, and then the thought of tackling an entire month’s worth of footage as my very first video was just way too scary! I was more than happy to have all those excuses!! So the Tropical Jungle Cat was never fully revealed, and kept under wraps until now. But the video is now live and I’m so excited to finally show you this project!
The video shows the entire process in detail but because it’s already so long I decided to post all the background info here, with all the tools and resources you’ll need to prepare for trying the project yourself – or something similar!
SUPPLIES
Here’s a list of all the supplies I used. The video will show you how and when they’re used.
- Atlas the Lion Cub (click here to get the pattern)
- Yarn (see the yarn section below for more detail)
- Felt tip marker (any type, any colour)
- Cardboard (aka card stock – it’s just thick paper, okay!)
- Scissors
- Latch hook
- Slicker brush (pet brush/cat brush)
- Knitting loom tool (Notice it’s not a hook, just a bent shaft with a handle)
- Felting tool (I used the Clover pen tool)
- Felting needles (These are special needles with a burred tip for felting (read more). I used Clover needles, fine weight)
- Pins with a large head
- 2 Felting sponges
- Measuring tape
- Loads of time and persistence!
TIP: You might also want to wear a dust mask to avoid inhaling the yarn fibers during brushing.


YARN FOR FUR & FELTING
You’ll need to use yarn that can be brushed out to create fur, using one of those pet brushes that has lots of fine metal bristles. This is vital for making fur! Not all yarns are brush-able, so make sure yours is before you begin. The yarn that I used is 100% acrylic and double knit (DK) weight. DK is the equivalent to yarn weight 3, light worsted, 8 ply or 11 wpi. The precise thickness of the yarn I used is 2.33m/g.
Because this was never intended to be a precise tutorial but more of a demo of ‘how I did this’, I didn’t keep close track of how much yarn I used, so these are approximate quantities as I remember them:
Green: 200g
White: 100g
Black: 100g
Pink: 25g
Eye colours: Oddments
PREPARATION & EXTRA NOTES
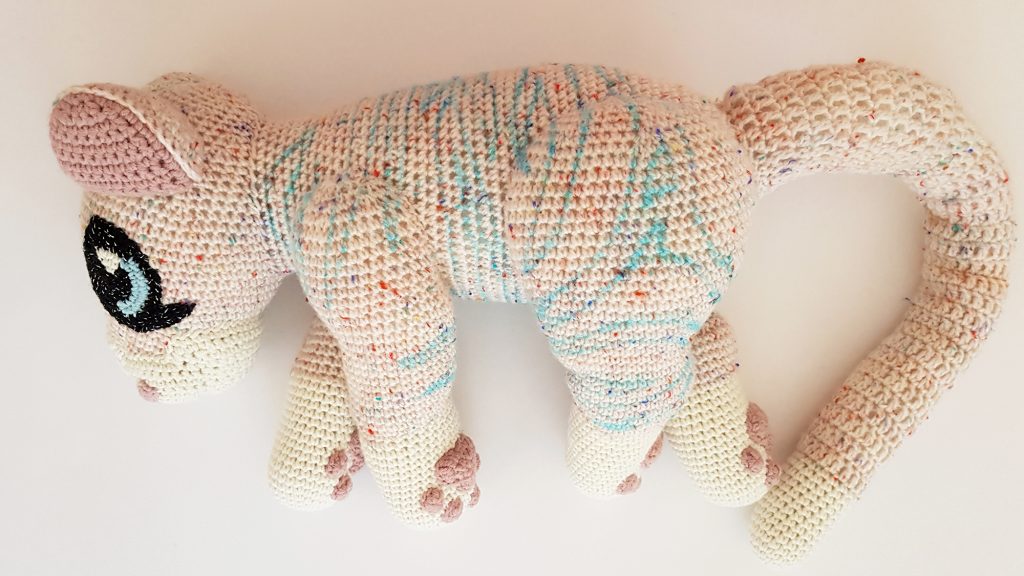
Make Atlas the Lion Cub using my pattern, excluding the mane, tail hair, eyes and ears. Assemble Atlas fully, as described in the pattern, then continue with the directions in the video. As I mention at 24:52 in the video, I would’ve put my toe and paw pads closer to the end of the legs with foresight. If you agree, then do so during your own assembly; I would try perhaps starting the toe pads at R2 (arrange the paw pieces in the same way as the pattern describes, just closer to the magic ring). Another option is to leave them detached until you’ve done most of the fur on a leg, leaving a bald area for the paw pieces on the bottom of the paw starting at the magic ring to R13, and then choose a position for them. You can also use the fur and felting methods on any other amigurumi of your choice and customize your own furry creature!
YARN: For crocheting Atlas, use any yarn of your choice. Since it’s going to be completely hidden by the fur, the colour and quality of yarn underneath doesn’t matter if you prefer to use up your stash or buy budget yarn for crocheting with.
ALTERNATIVE METHOD FOR ATTACHING YARN: If you’re completely nuts, you can use a crochet hook instead of a latch hook but it will take longer and … just don’t do it! If you must: insert your hook through a crochet stitch, loop a piece of yarn on and pull it halfway through the stitch, then grab the tails with your hook and pull them through the loop. Tug to tighten. (Demonstrated below on my Sundog the Tiger Mask)


DURABILITY: As a toy, this Jungle Cat might be suitable for gentle play. Although the felting will be firm and solid by the time you’re done, it can get pulled and snag on sharp objects. Personally, I keep my projects on a shelf and they don’t get played with so I can’t attest to the durability of the fur. It certainly won’t come detached accidentally but I suspect it might mat, although that should be remedied with brushing.
TIME COMMITMENT: So many people commented on my Instagram while I was making this tiger about how crazy I must be to do such a time consuming project! While it is mind-numbingly repetitive on this scale and that did drive me a bit nuts, it didn’t take half as much time as I usually spend on just designing one of my regular crochet patterns! It took me about a month of working on it most days. The repetition of making the fur is mundane but the felting is fun and creative, I would love to do that part again! So it’s not that crazy for me but to put it into perspective for yourself: Apollo The Octopus, which is my longest project, only takes me ten days to make, so that might give you an idea of how long this tiger could take you. Most of my other amigurumi take me about 5-7 days to make (Eg. Comet, Atlas, Rocket, Buzz).
NEEDLE HOLES IN YOUR FELTING: One person commented on how my felting job wasn’t quite complete. Apparently you’re supposed to keep on felting until there are no needle holes visible. I don’t have extensive experience with felting but by the time I finished my tiger’s face, the felting was too firm to stab into it anymore. I have heard since that you’re supposed to progressively user finer weights of needles and you can also rub the surface with your hands to smooth holes away. Now we know!

FELTING GUIDES
You’ll recognize these pictures from the video where I show how I planned my stripes. You can use these images to plan yours in the same way but remember they should only be 1 crochet stitch wide, so not as wide as they are in my planning sketches.


For the face, this diagram shows you how I ultimately placed my fur on the cheeks. The stencils on the right hand side will give you an idea of the ones I used for the ears, the white tufts inside the ears, and the eyes. They are to scale with the tiger’s face in this diagram.

Once the fur is attached and brushed out, you can use the diagrams below to plot and plan your felting on the face. Scroll for step-by-step diagrams.

From left to right: Block in the basic shapes. Add stripes and black details and build up the base of the eyes. Felt the iris.


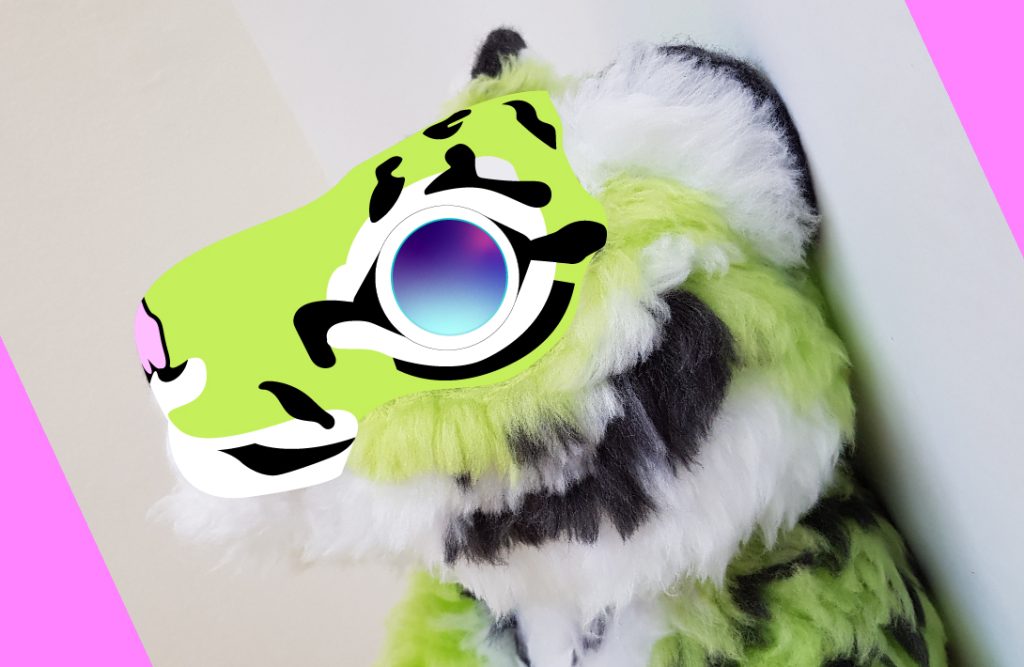
From left to right: Felt the pupil. Add spots and light reflections in the eyes. Attach the eyelids.


SHOW ME YOUR PROJECT
I hope you enjoy the video and let me know – in the video comments – what you want to see more of! If you decide to try this project or something like it, please share pics with me! You can tag me @Projectarian on Instagram or Facebook. Browse #TheTropicalJungleCat to see WIPS and more pics or #TropicalDoll2019 to see the other collab submissions, which are mostly dolls, I am one of the few deviant imposters!
PIN IT!

Thanks to Dollightful for hosting the collaboration! It was a great excuse for me to try something new and I enjoyed the event thoroughly! You can watch all the original collaboration videos at the links below and see everyone’s submissions including the doll that Katherine made for her event:
Collab announcement
Submissions showcase
Dollightful’s contribution
Thanks for visiting, see you again soon!
xxx
https://www.projectarian.com/wp-content/uploads/2017/03/27-1.jpg